
I made my Thanksgiving pies talk by baking pie letters into the filling. The result is winning me all the creative pie awards this year!
It is fabulously fun to make my dessert talk. See how it’s done below.
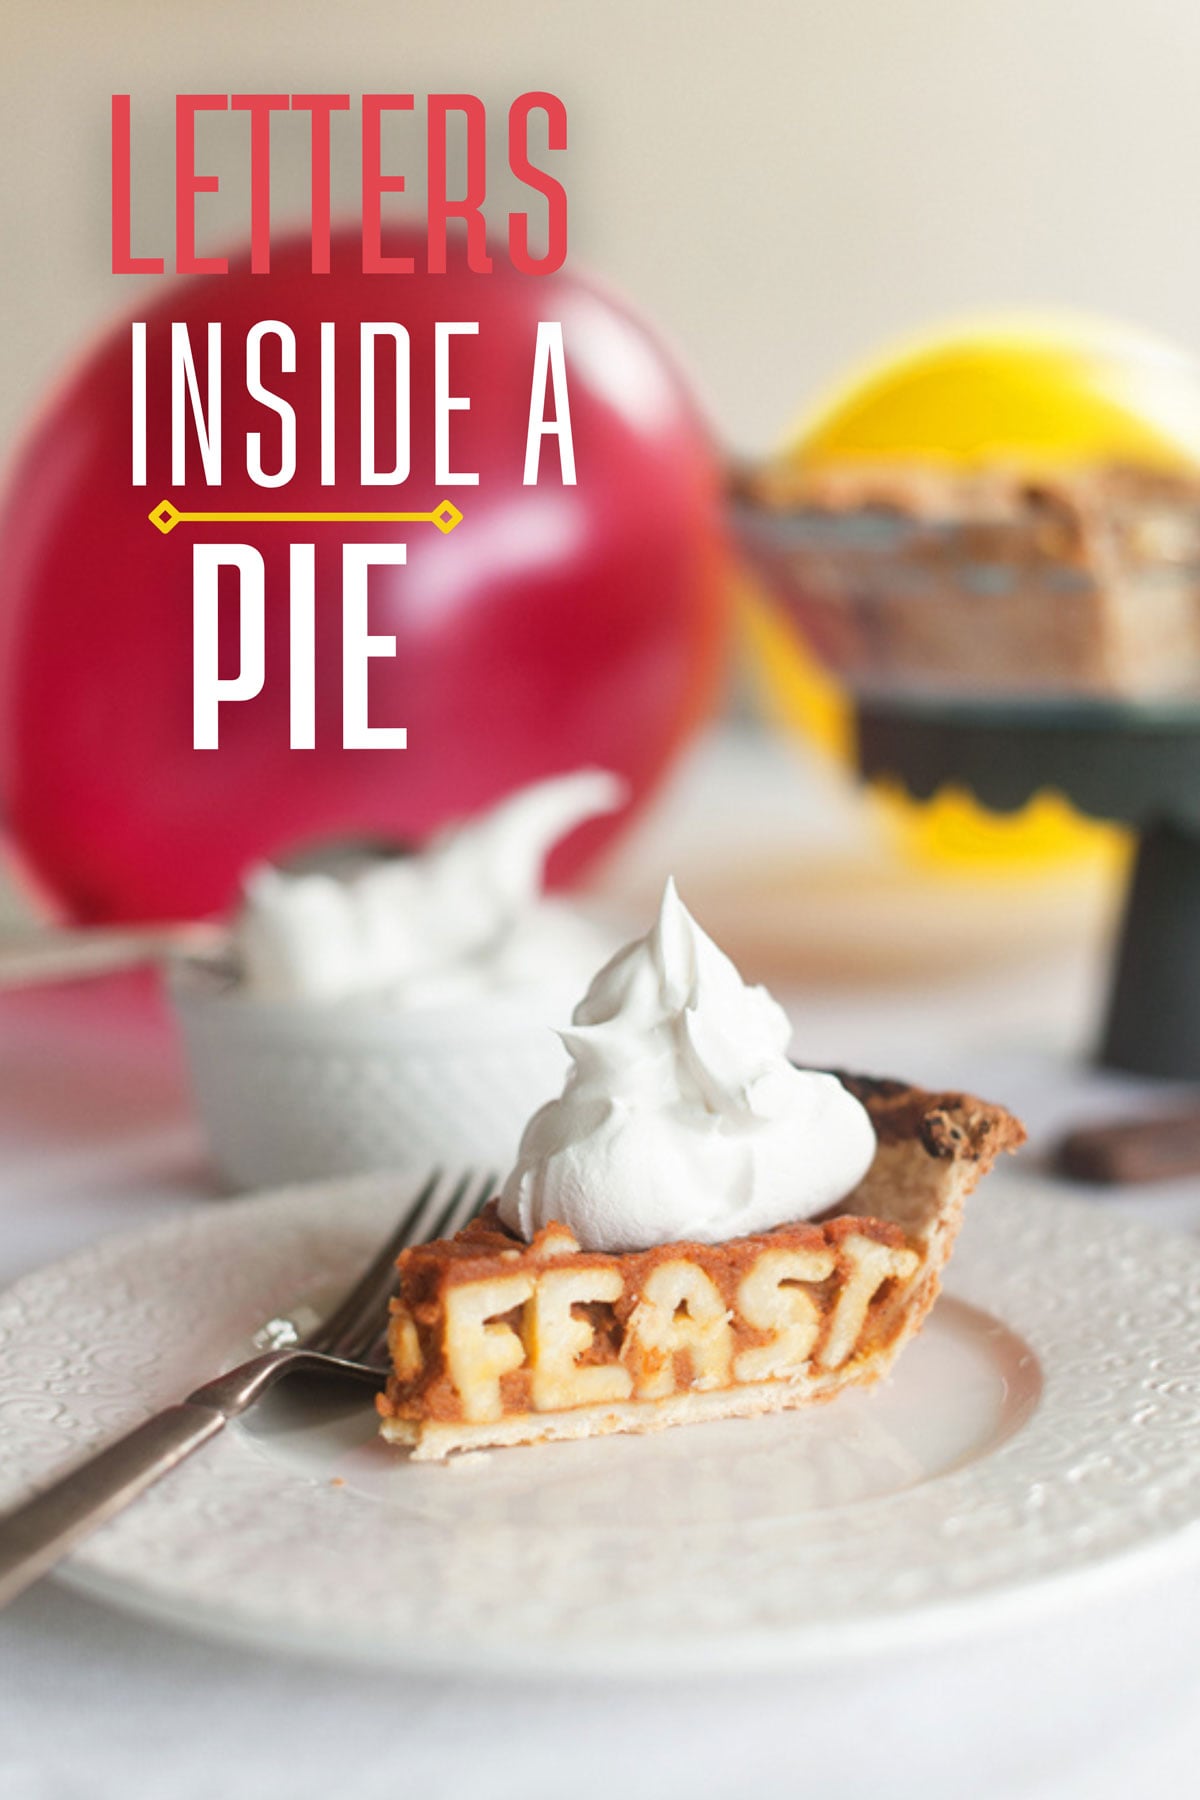
I’m calling this my talking pie, and it can be made in any pie flavor with any short word you choose.
Have a birthday boy who loves his pie? Use the pie letters to write out his name.
Want to wish joy at the annual Christmas pie exchange, or maybe just a nice statement of thanks at the feast table this month?
No matter what you have to say, it is SO MUCH better said in a pie.

Pie Letters, baked typography letters inside a pie
Equipment
- Mini alphabet cutters I used a set where the letters are 1″ high, 0.75″ deep, 0.5-0.75″ wide.
- Parchment paper
Ingredients
- double pie crust ready-made or refrigerated both work, but not shell as you’ll need to form letters from the dough
- Pie filling I made a pumpkin pie but this could be done in any flavor.
Instructions
- Preheating the oven to 400F. Roll out a single layer of the pie crust to desired thickness; this will be the layer you will cut the letters from.
- Decide the word or saying you wish to place inside the pie; it could be anything! Make sure the word will fit in a pie plate, starting from the center to the outer edge of the pie plate. So max 5-6 letters.
- Take the cutters that spell your word and cut out the letters from the dough. I used the word FEAST and created the word 8 times from dough. Lay the letters on a parchment-lined pan.
- Stick in the oven for 5-7 minutes. Remove the letters and allow them to cool.
- Next prepare the other pie crust in a pie plate with the rolled-out dough and lightly bake the crust for 10 minutes in the oven (you can skip the pre-baking step and simply place pie crust in fridge while you prepare your filling). Allow to cool.
- Cover the bottom of the pie with a thin layer of the pie filling; this will support the dough letters when you line them in the plate. Place the letters in the pie plate, spelling your word starting from the center and ending at the outer edge of the plate.
- Space the words out as evenly as possible around the pie. For my pie, I went around 8 times; this will result in 8 pieces of pie when sliced.
- Increase oven to 425F. Once the words are in place, begin to carefully spoon the filling into the plate. Try not to move any of the letters, and fill in all spaces before finally covering the top with filling. Bake in the oven for about 40 minutes.
- Remove the pie from the oven and let cool. When you’re ready to slice up and serve.
Notes
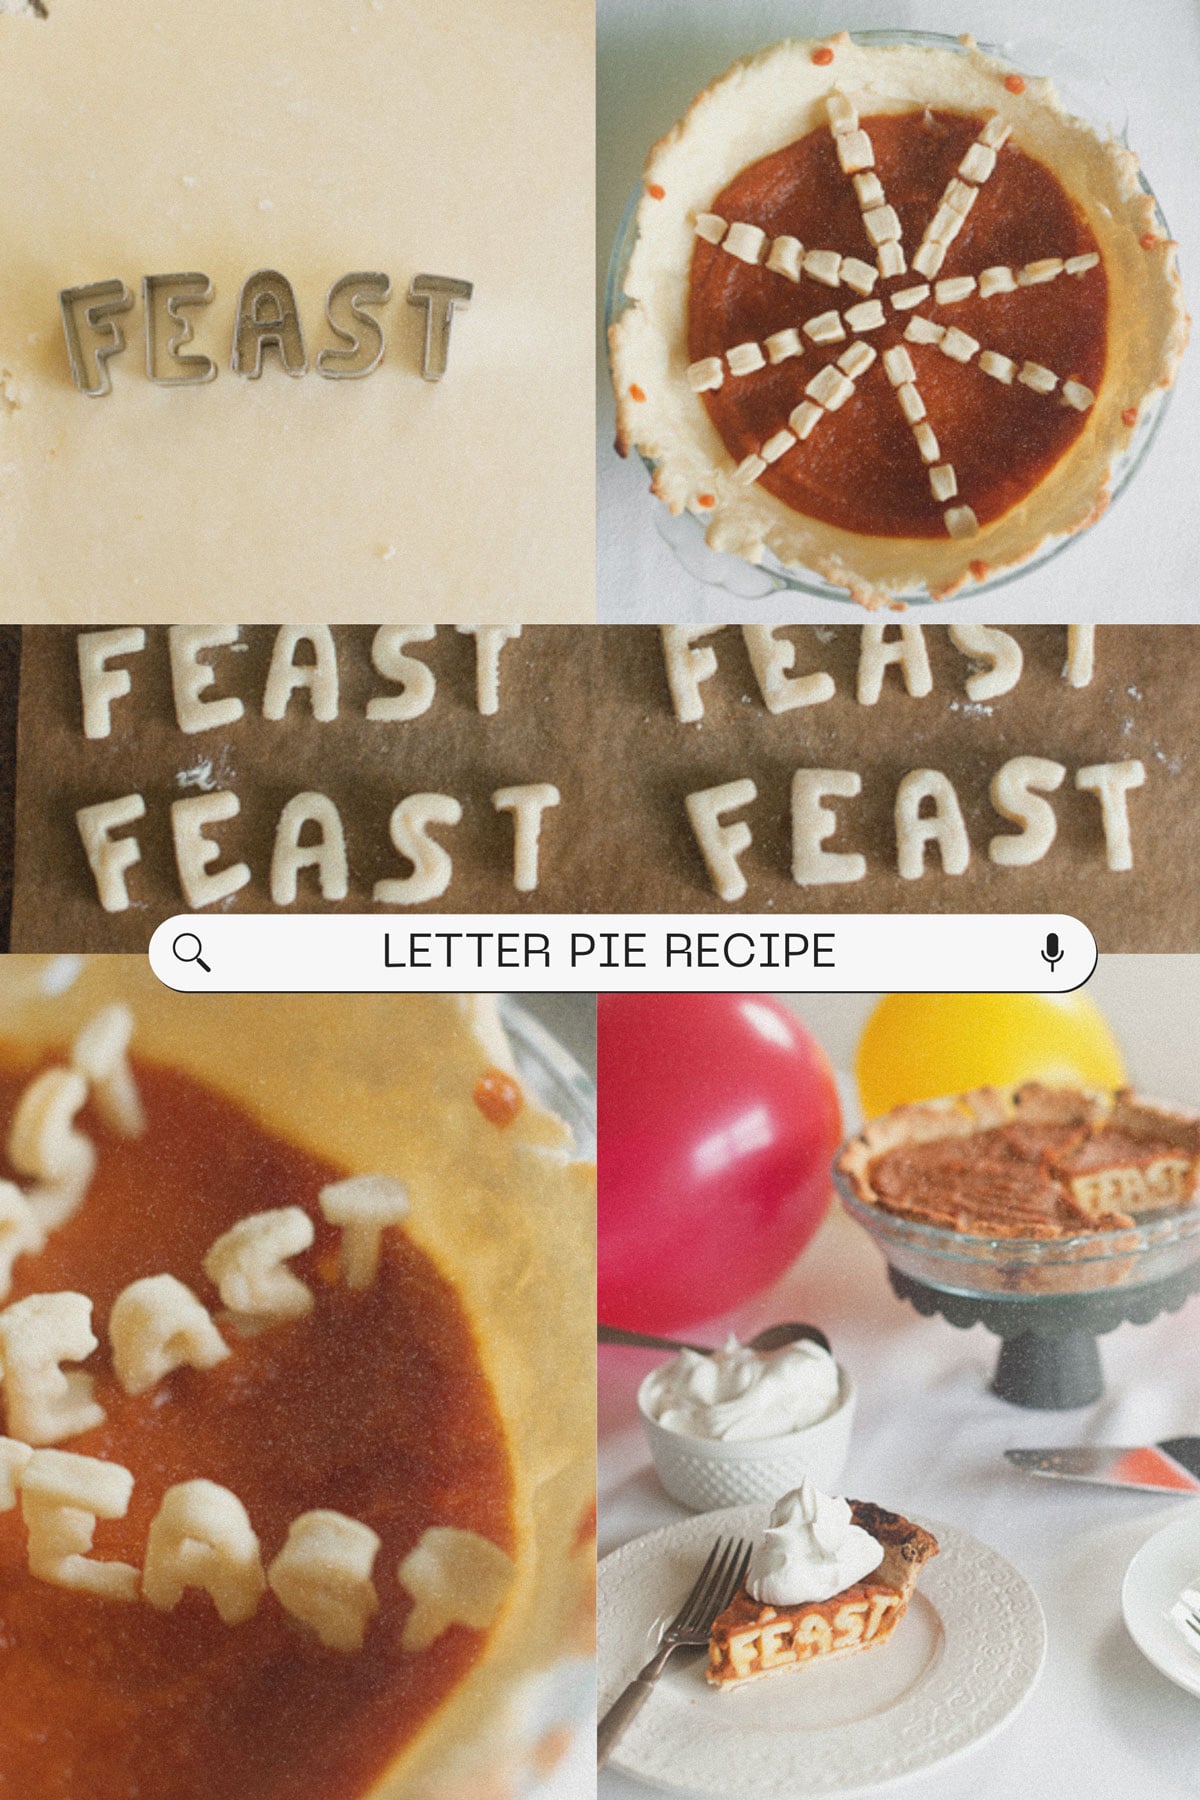
The pie letter slices will reveal the word once cut, totally surprising your friends and family at the table.
Just make sure you use the recipe note to cut the pie at the right spot so it reads well.

Serve pie with whipped cream, of course, and if pie is just not your thing, my typography cake will definitely do the trick.
PS. For other creative pie tricks this season, try my pie in a cake recipe or these adorable pie mug toppers.
Photography by Athena Plichta.