
Now that the weather is dropping, this hot chocolate cake recipe is a hit with my party friends.
Taking the cocoa mug cake trend, but making it an actual 4-layer party cake size, was a sweet way to celebrate my BFF’s recent cozy cold-weather birthday party.
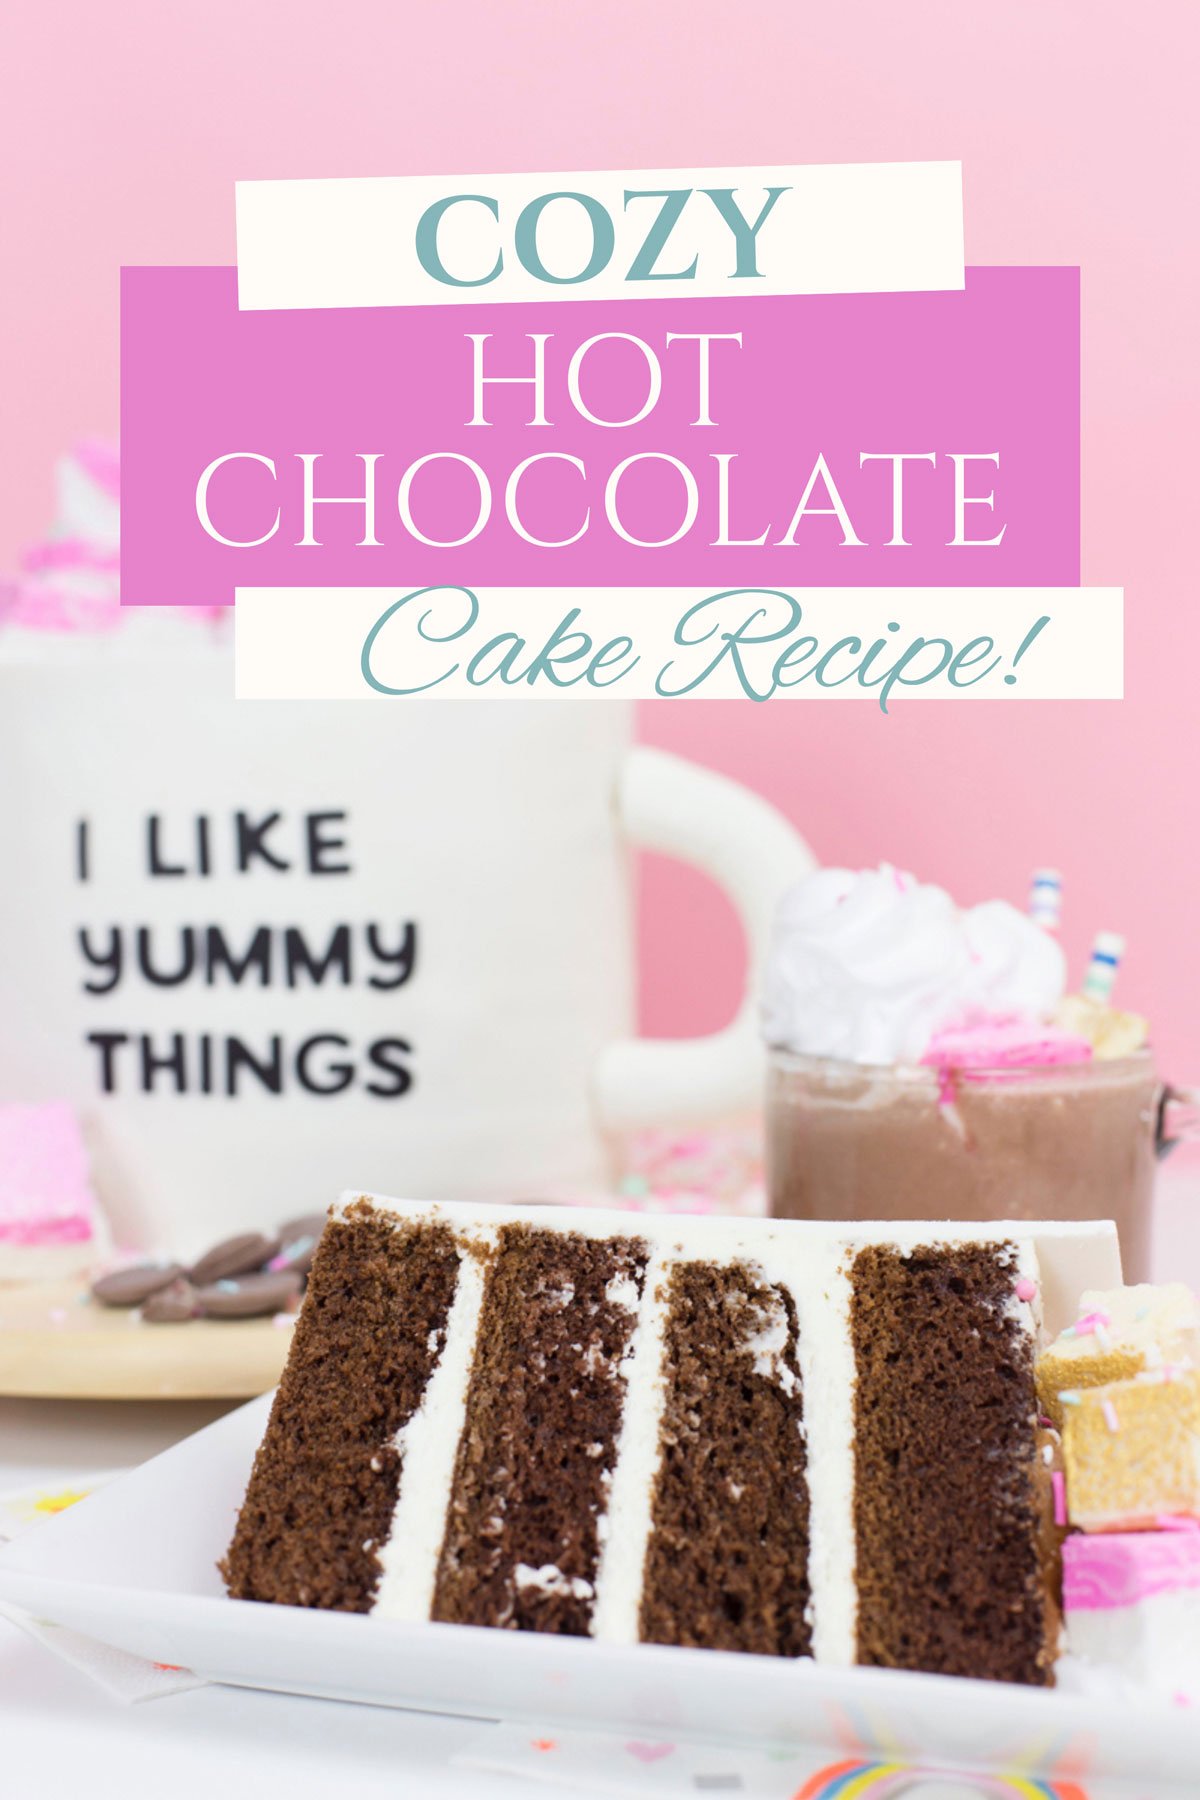
A cake that looks just like a super sweet cup of hot chocolate with tons of marshmallows, whipped cream, and sprinkles. Yes please!
I know the trend of making a cake in a mug is a big deal, but who wants to eat an individual cake out of a mug by themselves?
Instead, this version is even prettier & serves a crowd…
Because cake is better eaten with friends around.


4 Layer Hot Chocolate Cake
Equipment
- 2 8” round cake pans
Ingredients
Hot chocolate cake decorations
- 4 layers chocolate cake recipe below
- 5 cups Marshmallow Buttercream recipe below
- White Fondant
- Marshmallows any shape, size, color
- Whipped Cream
- Sugar Sheet Letters
- Sprinkles
Chocolate Cake Recipe (makes two 8” layers*)
- 3 cups all-purpose flour
- 2 cups granulated sugar
- 1/3 cup cocoa powder
- 2 ½ tsp baking powder
- 1 tsp baking soda
- 1 tsp salt
- 1 tbsp instant espresso + ½ cup hot water mixed
- ½ cup whole milk
- 1 cup vegetable oil
- 4 eggs
- 2 tsp vanilla extract
Buttercream Frosting
- 1 1/2 cups butter, softened
- 6 cups powdered sugar
- 7 oz jar marshmallow fluff
Instructions
- Preheat the oven to 350 degrees and prepare cake pans with parchment paper and a little butter.
- In a bowl, sift together dry ingredients. In a separate bowl, combine all the wet ingredients. On low speed (with a stand or handheld mixer) slowly add the wet ingredients to the dry ingredients. Once combined, scrape down the mixing bowl to make sure everything was incorporated well.
- Divide your batter evenly between your two cake pans. Bake at 350 degrees for 35 – 40 minutes until a toothpick comes out clean. Let cakes cool completely before assembling.
Marshmallow buttercream instructions
- In the bowl of a stand mixer (or handheld) with the paddle attachment, cream butter on medium speed until it’s a light yellow color. Slowly begin to add your powdered sugar.
- Next, add your marshmallow fluff and mix until well combined. Your buttercream should be a smooth spreadable consistency.
- Set aside about ½ cup of buttercream and add 2 tablespoons cocoa powder for the top of your cake.
Assembling the cocoa mug c ake
- Make sure your cake layers are leveled so you have four even layers. Next, stack and fill your cake layers with your Marshmallow Buttercream, adding about ½ cup to each layer and spreading evenly.
- Finally, frost your entire cake with a thin layer of buttercream for a crumb coat and stick in the fridge.
Notes

Assembling The Giant Hot Chocolate Cake
To make the cake extra cute, like mine is, you’ll need to do a couple more things once the recipe is done and ready.
Start by preparing your fondant pieces.
- You’ll need a flexible measuring tape and a rolling pin for this part.
I used to be so intimidated by fondant, but this technique is super easy and will look great. You can totally do this!
1. After your cake has chilled, take your measuring tape and measure around your cake to get the length of your fondant.
2. Next, measure the height of your cake and add about a ½” for the lip of your mug. My fondant piece was 22 inches by 6 inches, just for reference.
3. Roll out your fondant to about ¼ inch and cut your rectangle piece using your measurements.

4. Take your leftover fondant and roll into a thick rope and create your handle. I stuck a couple of toothpicks in the ends to help secure it to my cake. Let the handle dry overnight before attaching to your cake.
Finally, to wrap the fondant, spread another thin layer of buttercream on your cake and wrap your fondant piece around the cake. You can either use your hands or a fondant smoothing tool to smooth and secure the fondant.

Top your cake with the chocolate buttercream you set aside earlier. Add your marshmallows, whipped cream, and sprinkles to complete your Giant Hot Chocolate Cake.
You can have a lot of fun personalizing the hot chocolate cake mug. I used sugar sheet letters to add a fun saying, because who doesn’t like yummy things?!
You can also break out the paint brushes and decorate the mug with gel food colors to replicate your favorite cup!
One of the best ways I can imagine kicking off cocoa season in cake form!
PS. Pairs well with my festive & cozy wool ball garland.
(Project photography by Brandi Van Leer)